Scripting#
Scripts can be generated in a variety of ways, including the Macro Recorder.
For functions included in the ImageJ Macro language, please see:
https://imagej.net/ij/developer/macro/functions.html
More general scripting info:
https://imagej.net/scripting/
Macro Recorder#
https://imagej.net/scripting/macro
Use Plugins > Macros > Record (Ctrl-U) to start recording simple steps and begin generating code. Note that when clicking around in FIJI, you may generate unnecessary or overly specific commands, which means macros generated through the recorder will typically require some editing before use on other images.
For example:
Open Blobs via File > Open Samples > Blobs
Draw a circle or rectangle using the tools
Run Process > Find Edges
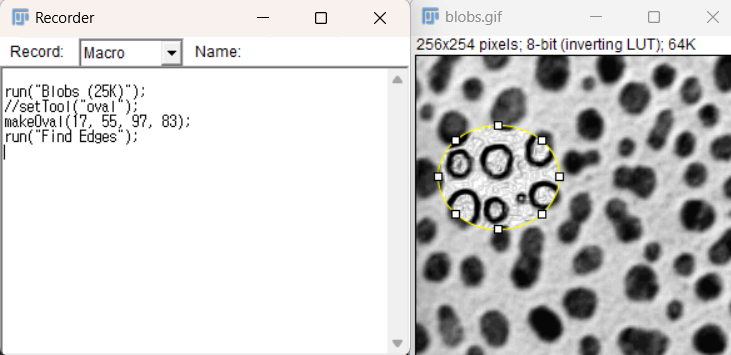
Press Create in the Macro Recorder to save the macro to disk and open it in the Editor.
Close the blobs image and press “run” in the Editor to run the macro, which repeats the analysis verbatim.
More example scripts:
https://imagej.net/ij/macros/
Why does the recorder not show a response for all plugins?#
Not every developer has made the plugins compatible with the macro recorder, which may cause various bugs or a lack of response from the recorder. In some cases, a script may be used to generate similar functionality, but other times this may just be a limitation of the plugin. The Image.sc forum would be a good resource for help if you are able to provide enough information about the error and the analysis goals.
 #
#
Batch Processing#
Batch processing can be done directly via the macro script editor using a provided template: https://imagej.net/scripting/batch#option-2—script-template
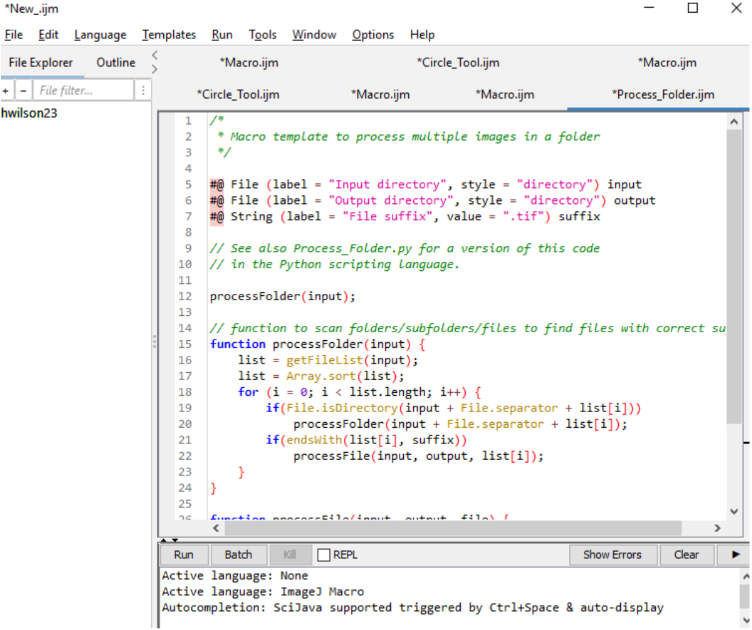
Open the script editor: Plugins > New > Macro
The template can be accessed in the script editor by using Templates > ImageJ 1.x > Batch > Process Folder (ImageJ Macro)
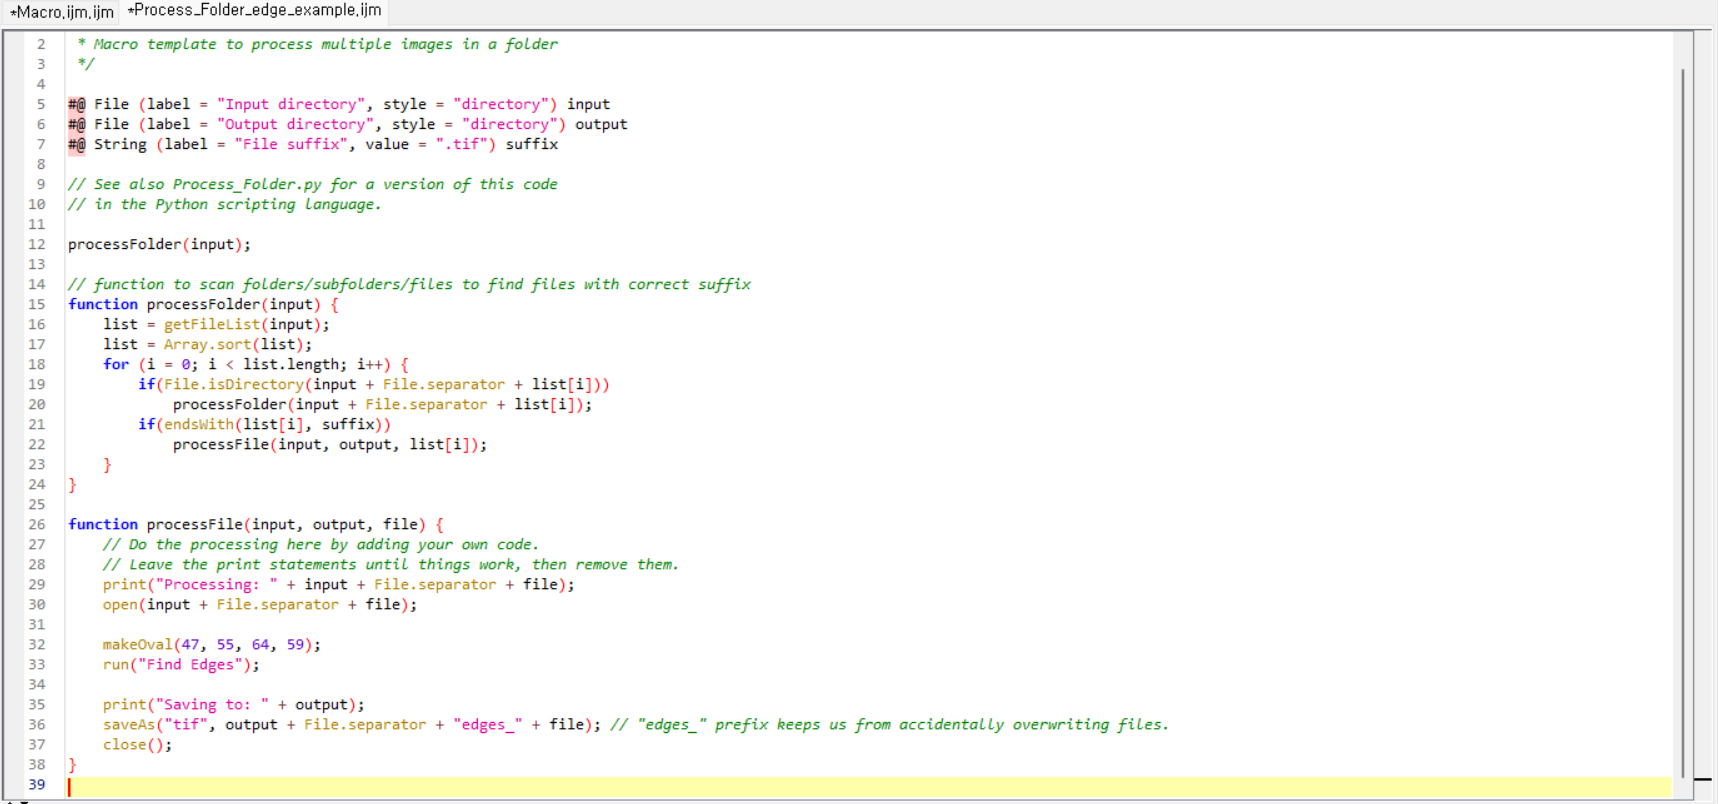
This template contains an existing loop to process each file in the folder using the “processFolder” and “processFile” functions. It requires the user to specify the input and output directory as well as the file information.
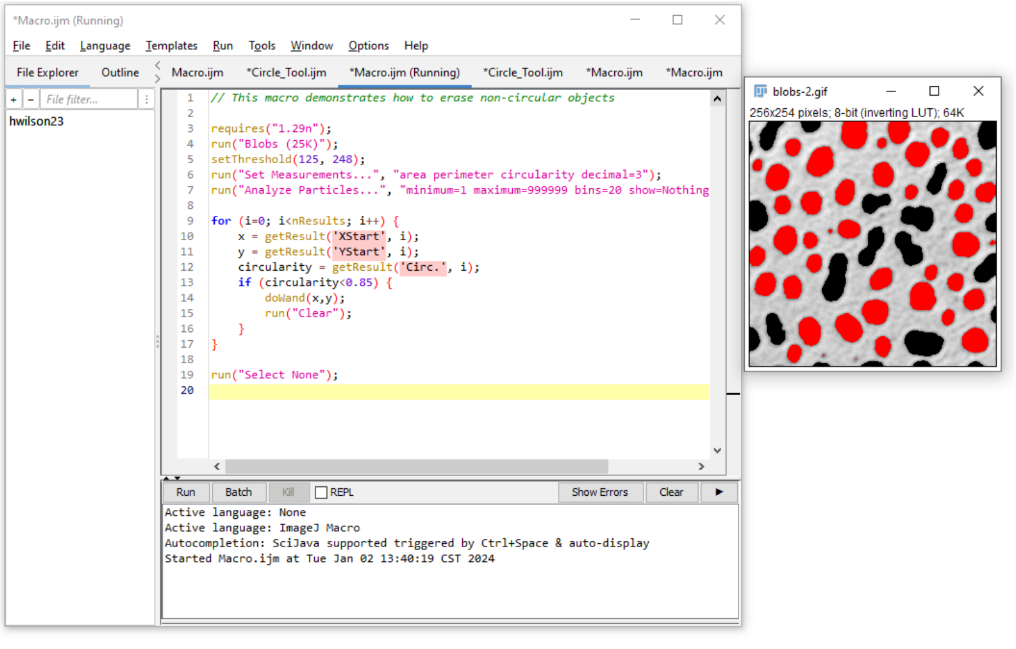
Here is a sample “processFile()” function to apply the above oval selection and edge finding macro to every file in the directory:
function processFile(input, output, file) {
	// Do the processing here by adding your own code.
	// Leave the print statements until things work, then remove them.
	print("Processing: " + input + File.separator + file);
	open(input + File.separator + file);

	makeOval(47, 55, 64, 59);
	run("Find Edges");

	print("Saving to: " + output);
	saveAs("Tiff", output + File.separator + "edges_" + file);
	close(); //Close the file after processing it.
}
When you are inserting the macro recorder script into the bottom function, remember to open and save the file using the
open()andsaveAs()functions.The benefits of this is that the files can be more specifically iterated if needed with minor adjustments to the code. For example, try changing
i++toi = i + 2to process every other file.It is good practice to use different “input” and “output” directories, to keep from overwriting original data.
When the macro runs properly, you can comment out the print statements with
//.Batch scripts run much faster when the image is not displayed on screen.
To prevent newly opened images from being displayed during a batch script, one can start the script with the command:
setBatchMode(true); // Don't show newly opened images
Ending the batch script with the following command will close all the images that were opened in the background except the active image:
setBatchMode(false); // Return to regular image opening behavior.
One can also use
setBatchMode("show"); // Show a single image
setBatchMode("exit and display");
Note
Note: the most common causes of scripting errors are failure to end a line with a semicolon and failure to include open() or save() functions for the images.